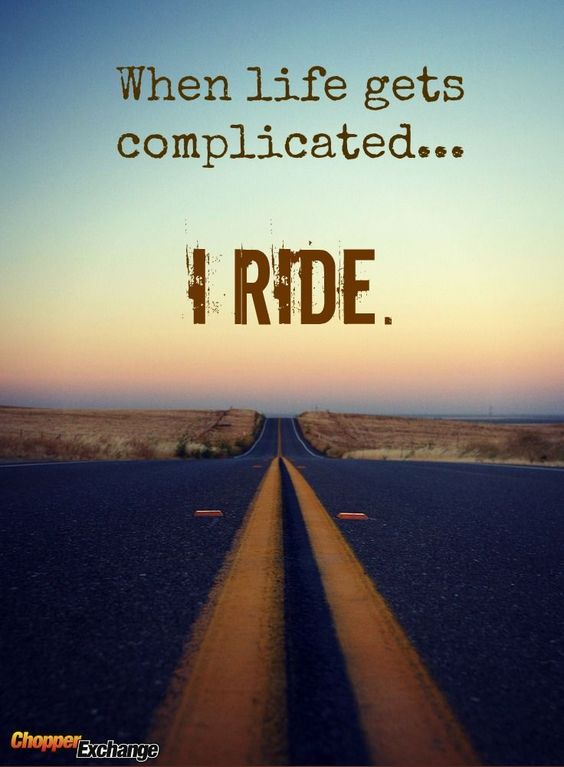
There are a number proven, mental heath benefits to riding a motorcycle, including a more positive outlook on life and improved cognitive function.
Motorcycling is so popular for range of reasons, but what great news it is to learn there so many proven, mental health benefits! Some benefits are obvious while others are more subtle. The psychological benefits of motorbike riding have been been studied researched, with some amazingly positive results.
The number one mental health benefit of riding a motorcycle – a positive outlook on the world.
1. Positive Outlook There is actually a scientific reason that motorcyclists feel addicted to riding. Why does motorcycling bring happiness, peacefulness, and put us in a better mood?
Dopamine is a so-called messenger substance or neurotransmitter that conveys signals between neurons. It not only controls mental and emotional responses but also motor reactions. Dopamine is particularly known as being the “happy hormone.” It is responsible for our experiencing happiness. Every twist of the wrist releases adrenaline which, in turn, releases endorphins. The fresh air and the sense of freedom, releases dopamine; these ‘feel good’ hormones improve our mood, increase pleasure and minimize pain.
When you are riding , your mind is fully engaged, which is kind of like a mediation! Meditation is a practice where an individual uses a technique – such as mindfulness, or focusing the mind on a particular object, thought, or activity – to train attention and awareness, and achieve a mentally clear and emotionally calm and stable state.
This state of focus we enjoy when riding, is drawing your mind into a naturally meditative state. The clarity of focus required to ride, where you enjoy the ‘little things’ on your journey (the smell of freshly cut grass) all naturally lead to you practice a mindfulness as second nature.
This is why your mind feels refreshed and ‘ironed out’ when you throw your leg off after a long ride.
The second mental benefit of riding a motorcycle – improve cognitive function!
2. Cognitive Function
Riding a motorbike every day can make you smarter and prevent the onset of dementia and Alzheimer’s disease, says Dr Ryuta Kawashima, author of the Nintendo game “Dr Kawashima’s Brain Training”.
The 57-year-old self-professed motorcycle fan conducted a study in 2009 at the University of Tokyo that found riders aged 40-50 had improved levels of cognitive function after riding their bikes daily to work for just two months.
The 2009 study by Dr. Ryuta Kawashima, looked at the relationship between motorcycle riding and the human mind and focused on riders with an average age of 45 some of whom were regular riders and others who had not ridden in 10 years.
The study asked participants to ride on courses in different conditions while he recorded their brain activities.
He found that current riders and former riders used their brains in different ways, and the current riders had a higher level of concentration because specific segments of their brains (the right hemisphere of the prefrontal lobe) was activated.
He also tested how making a habit of riding affects the brain. The test subjects had not ridden for 10 years or more. Over the course of a couple of months, those riders used a motorcycle for their daily commute and in other everyday situations.
The result? The use of motorcycles in everyday life improved cognitive faculties, particularly those that relate to memory and spatial reasoning capacity. An added benefit, according to the study? Participants said their stress levels had been reduced and their mental state changed for the better.
So why motorcycles? Shouldn’t driving a car should have the same effect as riding a motorcycle?
“There were many studies done on driving cars in the past,” Kawashima said. “A car is a comfortable machine which does not activate our brains. It only happens when going across a railway crossing or when a person jumps in front of us. By using motorcycles more in our life, we can have positive effects on our brains and minds.”
Another a scientific study, conducted by Ryuta Kawashima, who partnered with Yamaha Japan and Tohoku University, is referenced below. He notes that motorcycle requires a high level of alertness and rapid problem-solving. According to Kawashima, “the driver’s brain gets activated by riding motorbikes.”
The below is an extract from the findings of the study in partnership with Yamaha.
Yamaha Motor Co., Ltd. has been involved in joint research on the relationship between motorcycle riding and brain stimulation with Ryuta Kawashima Laboratory of the Department of Functional Brain Imaging, Institute of Development, Aging and Cancer at Tohoku University (Address: 2-1-1 Katahira, Aoba Ward, Sendai City, Miyagi Prefecture) as of May 2008. We are now pleased to announce the findings of this research.
Through this research, the relationship between motorcycle riding and brain stimulation has been verified as follows:
1)
When riding a motorcycle, the brain of the rider is stimulated.
2)
Differences in brain use and level of brain stimulation can be observed in motorcyclists who ride regularly and in motorcyclists who have not ridden for extended periods (at least 10 years).
3)
Incorporating motorcycle riding into daily life improves various cognitive functions (particularly prefrontal cortex functions) and has positive effects on mental and emotional health such as stress reduction.
“You see things vacationing by motorcycle in a way that is completely different from any other. In car you’re always in a compartment, and because you’re used to it you don’t realize that through that car window everything you see is just more TV. You’re a passive observer and it is allmoving by you boringly in a frame.
On a cycle the frame is gone. You’re completely in contact with it all. You’re in the scene, not just watching it anymore, and the sense of presence is overwhelming. That concrete whizzing by five inches below your foot is the real thing, the same stuff you walk on, it’s right there, so blurred you can’t focus on it, yet you can put your foot down and touch it anytime, and the whole thing, the whole experience, is never removed from immediate consciousness.”
______________________
The description in italics below is my personal reflections about motorcycling. [The section further below (after the italics) is more of a real world account of what you might experience on your first ride)]. Motorcycling means a lot to me, and I write this blog out of a passion: I hope some of my passion touches you and that your are encouraged to get out there and start riding too.
“Riding a motorcycle is a tangible essence of freedom. An addictive, hedonistic experience where your senses are assaulted and brought to life. Every journey is a joy filled juxtaposition of both terror and peace , a thrill of adrenaline fueled excitement coupled perfectly with the blessed serenity of a cleared mind.
When motorcycling, you understand more clearly (whether consciously or subconsciously) that your mortality is an inescapable truth. You appreciate more keenly you have a finite existence on this earth, because you know you must accept a certain ‘risk’. This risk, is that when motorcycling, you are simply more exposed and vulnerable (for a multitude of reasons) versus choosing another form of transport. What sets you apart, is that you can see in the path before you, many joy filled, and thrilling experiences, indefinitely more rewarding than the risk, because my friend, you are a motorcyclist.
As you travel on a motorcycle, your surroundings do not simply hurtle past without meaning. Instead, you feel a sense of belonging – you are somehow actively engaged as part of a living landscape. When riding a motorcycle you feel part of life’s tapestry again, instead of being on the outside looking out as the world passes you by. You are no longer just a spectator.
Acceleration on two wheels can (and will) intoxicate you. This simple Newtonian force is delivered in such a visceral way on a motorcycle, that it is simply nothing like what you might experience in any ordinary sports car or any other form of transport. That instant pull of force on your arms as you grasp onto the handlebars, coupled with your legs clamping onto the fuel tank, straining to remain on-board as you are fighting against the intent of the wind as it batters into your chest. You feel in your core that the wind blast is screaming, it howls like an angry beast, its desire is to rip your body away from your saddle. Welcome fellow rider, you are now engaged in the battle! Throughout this whole experiencing of mind bending acceleration and wind forces, and even with a tempest of violent noise roaring from your exhaust, and the vibration singing from your engine as revs sore higher and higher, you must remain calm. Your heart rate must remain steady, your grip on the throttle must be relaxed and gentle – your life depends on you being in a place of control and having dedicated focus.
This is the key to your survival, you must always be assuredly calm and gentle with your inputs that control your motorcycle. Quite simply, your life depends you achieving a state of focused ‘motorcycling zen’ . It is here, in this place of focus , where I find motorcycling gives us its greatest gift. A place set aside from all the thrills and sensations your body is being subjected to as you ride. A place where the art of motorcycling, by necessity, brings your mind and soul into the present moment. A place where you can neither muse over the past left behind you or worry for the future ahead.Motorcycling can shift your mind to a position of singular purpose, taking you away from the overwhelming blizzard of distractions that modern life throws at us. ” Author SmartMotorcyclingGuide.com (Copywrite)
Things you will experience practically on your first ride:
Vulnerability. For the first time, you experience yourself at a road junction, naked. Surrounded by car drivers, by these cages of steel, but you are free. You are looking at these machines from a vantage point you have never experienced before. You lift your visor and can hear their muffled radios through the closed windows, feel the radiant heat from their hot waft from the engines surrounding you, and smell the acrid exhaust fumes from their tailpipes. It is a sensory overload. You feel like a lithe panther, stalking through a pack of muscular buffalo, you are vulnerable to their bulky mass and size, but you are prepared, alert and ready.
The feel of the wind. You feel the wind like you’ve never felt it before. It moves you and your motorcycle around, strong gusts of wind easily can send you veering offline, but you are constantly correcting, constantly concentrating. Your head is enclosed in your helmet, but is buffeted by the wind, battered and knocked. You turn your head to the side for first time to check blind spot and you are shocked as your neck strains against the force pulling of the gusts which have caught the flat side of your helmeted head.
The feel of the road. You feel the road surface as if tracing it with the tips of your fingers. You notice how the grip changes between different surfaces, how the shiny black tar of ‘crack fillers’ and the freshly painted road markings are scary as hell because they offer such little grip. You see now how some deep cracks in the road can be as wide as your tires and that your life depends avoiding them. As your experience grows, your body becomes adept at adjusting to being thrown around by the wind, your neck becomes stronger and resists that wind buffet. As your body adjusts riding against the wind becomes second nature and you grow into a newfound competence where you enjoy the challenge of reading the road.
The smells of a journey. When you ride a motorcycle, you notice smells in a way that you don’t when you travel by car, or even by bicycle. The smells change frequently, which increases your awareness of them. These smells greatly impact the experience, and help to form lasting memories in a way that are very unique. You will remember the mossy, earthy smell of the riverbank as the road dipped down towards a river in that one section. You will look back fondly at that turn where you passed that open farmland where for two miles you were enveloped in a sweet fresh scent of cut grass. You remember passing that quarry and smelling a dry dustiness of broken stone, something that you did not know you could even smell or sense.
Temperature. Sometimes you will notice that you are close to a river or other body of water before you even see it, because you ‘feel’ the temperature drop. You just don’t notice it on a bicycle because it happens slowly, and in a car there is too much insulation. When a cloud moves over the sun for a few minutes, you feel your hands start get colder on the handlebars as air temperature hitting your knuckles has dropped.
Speed/Acceleration. Motorcycles, especially sportbikes, accelerate like very few cars do. A sportbike can reach 100 mph in a little over 5 seconds (in the right hands!). The acceleration is so fast that it’s almost overwhelming. Now, in terms of speed, when you ride a motorcycle you experience velocitation in a significant way – that is the phenomenon by which your body and reflexes adapt to high rates of speed, which then ‘seem’ slower after extended periods of time. So you can go very fast on a motorcycle, but your body is so connected to your machine you quickly ‘adapt’. The speeds you are travelling at ‘seem’ to become more manageable and normalised. Your body has adapted its sensory perception where you feel, intimately, everything that is going on with you in connection with your bike, even at these high speeds. You must as new rider be aware of this phenomenon, prepare yourself for velociation, because it lulls you into ta false sense of security: your body simply grows acclimated to these incredible speeds you can easy reach on a bike. You must work to pull yourself come away from that world of speed on the public roads, the place for experience is only on the race track, book a track day now and experience a safe (er) time of pure theater and excitement!
Lean Angle. Unlike 4-wheeled vehicles, riding a motorcycle requires you to manage traction, and lean angles and acceleration and braking forces all at once. So it’s significantly more involving than driving a car. To add to the thrill, motorcycles lean over when turning! (While many modern sport-bikes motorcycles can be leaned over to the point of dragging hard parts of the machine (or your knee) on the ground – you’ll not experience this in the normal road riding but you will still feel that sensation of “leaning over” on every ride!) Leaning your bike over in turns adds a huge amount of fun to the experience. There is really nothing like it. (Look out for my article soon to come on explaining counter steering!)
Your body is engaged. Both your hands and feet are always busy. This might sound pretty obvious to any rider, but before I started riding, my entire knowledge of motorcycle riding was pretty much based on Excitebike and other video games. (Twist the throttle, make a turn, how hard could it be, right?) So when I realized how much your hands and feet are working while you ride, it kind of took me by surprise. For the most part, there is no such thing as an “automatic” motorcycle; all motorcycles are manual. Your left hand is working the clutch and the indicators (turn signals), your right hand is working the front brake, your right foot is working the rear brake, and your left foot is working the gears up & down. It’s a lot more work than it seems, but this engagement and involvement with your machine adds to the pure joy of riding.
The sense of mortality. When you ride a motorcycle, you’re truly putting yourself at the mercy of the rest of the world. When riding you are, at all times, keenly aware of your own mortality. And quite frankly, you should be. Once you start relaxing or acting carelessly, it could be over. This is why where I talked about that ‘focus’ that is required of you as a motorcyclist. When riding, when concentrating, you find yourself brought into a place of zen like peace and calm, a place of hyper awareness, a state of mind that allows you to access your senses, and control your entire being with a peacefulness that is incomparable. This state of mind translates to a smooth and gentle input on the controls of your machine no matter what you experience on your ride.
You become a better road user, and better car driver. You stop trusting people to act rationally.This is a key part of the motorcycle experience. All those small things that happen on the road which people don’t think much about? Motorcyclists notice them, and are constantly making lots of small decisions accordingly. You notice the big things, the small things, and everything in between. “Is this guy in front of me texting? Is that guy going to pull out of his parking spot? The surface in this lane sucks, is it safe to switch? Is that car going to cross my path to exit? When is this truck moving over, I don’t see his indicator yet? Am I out of his blind spot yet?” You might feel like the king of the road, but you learn quickly that cars & trucks aren’t thinking about you at all. You learn to constantly analyze other people’s agendas & learn to predict their behavior. (My blog on defensive can help you learn more about this – please take time to read it)
As I said above, I am passionate about motorcycles and about motorcycling. I would love to hear your thoughts on what motorcycling has meant to you below. As I said above, I hope some of my passion touches you and that your are encouraged to get out there and start riding too.
In this rapidly changing situation, I wanted to write a quick article around motorcycling and COVID-19.
Before we get into things, this article was written 21st March 2020 : so please be aware and check the most up to date guidance and advice from your local authorities and governments. Guidance will be changing on a daily basis; please adhere to whatever the most current guidance is.
On the 20th March the UK Government announced that all bars, pubs, clubs restaurants, and gyms are to close, as well as many other small and large businesses across the UK : a serious step up in the response to combating the spread of COVID-19.
At the moment, there is no UK Government enforced lock down or restrictions on UK domestic travel by car or motorcycle, so right now, you have the right to go out for a motorcycle for pleasure. The question you need to ask yourself is, should you?
The argument in support of going for a solo ride (for pleasure) is that (if you do not need to self isolate) it is an activity you can enjoy yourself, alone, without posing much unnecessary risk to others. (And obviously, if you are required to continue to work (and cannot work from home) then if your motorcycle is your transport, you’ll still be motorcycling as part of your commute.)
Some counter arguments against going for (a ‘pleasure ride’) might include:
You might be putting yourself (and others) at risk as your journey is not really a necessity, if you need fuel for example, you’ll be touching a fuel nozzle, then as you take your helmet on and off you will likely be touching parts of your face.
Let us also be real, motorcycling is inherently dangerous: having even a light tumble would be putting unnecessary & needless burden our already strained healthcare staff and systems.
In my opinion group rides are not adhering to the ‘spirit’ of social distancing. [Yes, while you are on the bikes, it is maybe ‘OK’. BUT, your ride automatically becomes an unnecessary social gathering as soon as you stop for food or coffee or for fuel together. (My riding buddies and I are cancelling our planned tour to the Lake District (England) in May 2020, even though we’ve been looking forward to this for most of the past year – but we have had no hesitation in doing so).
If you are showing any signs of infection, the UK government advice (currently) is you should be self-isolating : this means you should be staying at home.
The below guidance from NHS UK (21st March 2020)
You’ll need to stay at home if you have symptoms of coronavirus (COVID-19) or live with someone who does.
Staying at home means you should:
not go to work, school or public areas
not use public transport or taxis
not have visitors, such as friends and family, in your home
not go out to buy food or collect medicine – order them by phone or online, or ask someone else to drop them off at your home
You can use your garden, if you have one. You can also leave the house to exercise – but stay at least 2 metres away from other people.
[This last piece of advice (that you can leave the house for exercise even when self isolating) might mean we can still adhere to self isolating AND still get out for a ride. But again, if you stop for fuel, you could spreading the virus when you are handling the pumps.
For me, motorcycling has been good for my soul and has helped my mental health enormously on many occasions, but if I am required to officially self isolate – I will be staying at home and will not be riding my motorbike.]
Everyone, including motorcyclists should get to know the government’s guidance on social distancing (available here) and take every precaution when leaving the house.
If I am not required to self isolate (IE when I am healthy) – I may still go for limited solo rides but I am restricting how far I go, and will be very careful at fuel stations, avoiding close contact with other people. (I will continue to ride (solo) only as long as the UK Government does not impose a more strict travel ban).
What you do, is up to do you, but your decisions may impact others.
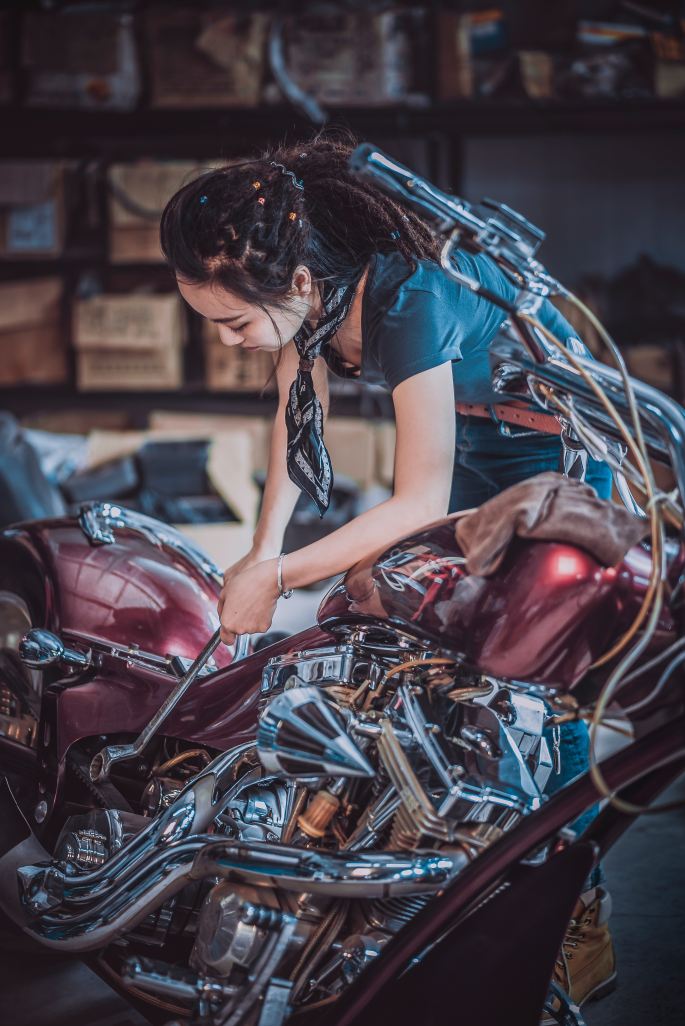
I’m not exactly sure what she’s doing with that wrench..prodding the drive belt?
There a few things you should check on your motorcycle on a regular basis. Smart Motorcycling Guide is about real world, honest motorcycling. I absolutely admit, I do not run through an entire pre-ride check list every time I ride : but there are some ‘primary safety checks’ that form part of my routine every single time I ride.
I encourage you to at least read the lists below as quick reminder of the things that you should be checking, every time you get a chance! My advice is to start doing at least the primary safety checks first, so that you build a routine. The plan should be for every journey:
1. Check your bike
2. then put on your helmet on
3. throw your the leg over it, and ride.
Motorcycle maintenance check lists are good at getting your mindset in the right place, especially if you do not have your own routine already established. Do make your own basic motorbike pre-ride checklist, and stick it on the wall of your garage, or use the one below!
Look out for where I mark some of the checks as “PRIMARY SAFETY CHECK” : these are the most important from a safety perspective.
Failure to prepare, is preparing to fail!
You should have a handbook with the specs for your bike, if not, go get one. It is fairly easy to pick up workshop manuals for various models on eBay in PDF or CD form for little money. (You may be able to find some data for your particular motorcycle on the net, or YouTube!)
Whereas with a four wheeled vehicle you may get away with being lax with things like tire pressures etc, this is not the case with a motorcycle. Motorcyclists pay the for the thrill, for the feeling of motorcycling freedom, with risk.
In essence, this exposure & freedom requires the acceptance of increased danger versus being caged and protected inside a car. (There’s no doubt the increased risk, is also part of the thrill). It is smart motorcycling to be as prepared as possible : make your ride as safe as possible so that you can continue to enjoy the thrill of two wheels.
One of the best things about motorcycling is learning Basic Motorcycle Maintenance.
It is ‘smart motorcycling’ not to compromise the safety and stability of your motorcycle, for the sake of a bit of routine maintenance.
Pre-ride check list
•Tires – check condition and for foreign objects in the tread. It is also vitally important to keep your motorcycles tire pressures either on spec for you specific bike, for the riding conditions, or very close to it. [PRIMARY SAFETY CHECK]
•Oil level – always check with the bike on level ground, hold it upright off the stand if you can so that the oil settles level in the sump.
•Coolant level – only if your bike’s liquid cooled, obviously.
•Chain – check the tension and make sure it’s well lubed. [PRIMARY SAFETY CHECK]
•Brakes – check they work and that they feel good. [PRIMARY SAFETY CHECK]
•Lights – check all your lights, especially the brake light, you don’t want to get rear ended, do you?
•Visual inspection – self explanatory.
•All ok? – hit the road.
Periodical checks
•Check battery – see that the connections are tight. Also check the electrolyte level on some batteries, a lot of newer batteries are gel filled, sealed for life types, so no need with these. Have you got a trickle charger?
•Carb balance – if your bike is multi carbed get yourself a Carbtune or similar [this is the one I’ve used on my Cafe Racer Build] It can be a little tricky the first time you balance them, but when you’ve done it once, the second time will be easy.
•Ignition timing – only necessary on some bikes, most newer models have electronic ignition which does not need touching, normally.
•Valve clearances – unless you’re a good home mechanic, take it to a dealer.
•Wheel bearings – you’ll need a stand for this. The one below is not wildly expensive. grab each wheel with it off the ground and see if there is any sideways play. There should be none or maybe a trace at most.[PRIMARY SAFETY CHECK]
•Steering head bearings – with the front end off the ground, grab the forks and push and pull. There should be no play. [PRIMARY SAFETY CHECK]
•Brakes – check fluid levels, brake hoses for deterioration, and pads/shoes for thickness. [PRIMARY SAFETY CHECK]
•Cables and levers – should operate smoothly. Get some grease on lever/pedal pivot points, and get some lube down the cables, if you can. A cable oiler is a handy tool.
•Nut and bolts – go all round the motorcycle with your spanners and check that all nuts/ bolts/screws are nice and tight.
Well, that’s about it for some basic maintenance, obviously, unless you’re a good home mechanic, any bigger jobs might have to go to a dealer or your mechanic.
Why do SWAT teams all wear body armor? Maybe because they know there is a chance they will get shot? Maybe wearing that armor pushes their chance of survival WAY up? No guarantees, mind you, but definitely better to be shot with it, than without it.
Riding a motorcycle is the definition of fast, fun, freedom right? So taking time putting on all that safety gear can feel like a real nuisance.
ATGATT – how to look uncool?
We all want to look cool, not like some safety gear nerd with balls the size of peanuts! Putting on all that gear can be a cumbersome buzz kill – there is no doubt about it, 5 minutes of faffing around to get kitted up is not as much fun as actually riding a motorcycle..who would have knew.
I know the struggle, but I’m now an ATGATT rider 99.9% of the time. You can make up your own mind, but good medicine does not always taste nice, but it is good for you in the long run ( and you’ll quickly get used to the taste) !
What marks a really great rider, is having that awareness, that appreciation, for just how dangerous the sport / hobby can be, for those who are unprepared.
What’s the worst that could happen?
As a coping mechanism, it is healthy human nature not to continually think about the worst that could happen, otherwise, we might never leave the house! But, we should take some time to appreciate and consider the consequences of what might happen if things go wrong, it helps us prepare intelligently. (Smart Motorcycling!)
By failing to prepare, you are preparing to fail.
Learning to acknowledge potential issues in life, helps us make informed decisions and prepare better to deal with them when they come along.
One of the things you might like to avoid is road rash. Instead of that little red tingly rash on your elbow that its name implies…instead, the accounts of riders who have experienced this say it’s not ‘rash’. Instead, think of the pain of your skin being ripped and shredded. How would it feel to have a cheese grater rubbed on your buttock, but not just an ordinary a cheese grater, but one moving at 30mph?
Heads up.
Hundreds of our biker brothers die on our roads ever year, BUT hundreds are SAVED by helmets. Research by the NHTSA (National Highway Traffic Safety Administration) says that around 1860 lives are saved in a single year, by motorcycle helmets.
A study by the University of Michigan looked at 15,000 motorcycle crashes over 4 years, and calculated that the risk of fatality as ALMOST 300% higher for riders not wearing a helmet.
Talk to your biking buddies, even talk your other less cool ‘non biker’ friends, heavens, even talk to your parents. You WILL hear lots of stories about someone getting killed or seriously injured on a motorcycle, so let us be smart about this : if someone told you there is some way to avoid the chances of death by a factor of 300%, would you ignore them?
Maybe you hate wearing armored gloves because because it reduces the intimate feeling you have between man and machine…how could you ride like Rossi if you cannot truly ‘feel’ those controls? On the other hand, what about when you loose the skin on your fingers and hands…you’ll never again be able to feel what is like to ‘touch’ the skin of someone you love again..is that worth feeling the rubber of the handlebars?
What about those times when having to put on full boots with ankle protection is too much of chore? Would it be worth that struggle if it meant you will be able to play football again in the future, or does having the tendons in your ankles torn off sound like more fun?
If you’re riding a bike, you’re a grown up. It is up to you decide on the risk you take, but the above examples are something to think about.
It really is up to you…
Going ATGATT is about being always prepared for the worst, but hoping for the best. At the end of day, the choice is up to the individual rider, you you must be prepared to live with the consequences of your choice of protection. For me, ATGATT provides me with the best ‘chance’ to ride another day, if things go seriously wrong. For that reason, for me, ATGATT will always be worth the hassle, always worth the cost.
The notes on the gear below are just some summary notes to think about – we will publish more detail guides around these individual parts of your gear in the future!
All the gear , all the time.
Properly fitting, full face helmet
If you can, go into the your local motorcycle dealership and get them to help you with helmet fitment. If your dealer is worth their salt, then they’ll know exactly how to size you up. Expect them to twist your helmet to check for movement on your head – they will maybe press their fingers in around your cheeks and forehead – they will ask you lots questions. The helmet will feel very tight if you’ve not had one on before. Over time the foam pads does soften, but it needs to be REALLY snug. (You can still buy your helmet online – as long you’re confident in the fitment and that the online is reputable – do not buy from ebay second hand.) Make sure the helmet you buy has the appropriate safety makings. If must have at LEAST ONE of the three safety markings DOT , ECE , SNELL , if not walk away.
Two helmets enjoying the view
Full Gauntlet Gloves
Gloves are important – getting a stone chip on your knuckle at 60mph is going to feel like a bullet, and frozen hands can really impede your ability to control your motorcycle.
Good gloves will still leave you with enough flexibility and feeling to have excellent dexterity and mobility to best control your motorcycle.
Pay for good, motorcycle, armored /reinforced gloves. Those mittens your Granny knitted are good for playing in the snow, not for your motorcycle.
A gauntlet glove is one that has extended coverage that comes right down over your wrists. The idea of this is that your wrist is a weak point – vulnerable to injury; gauntlet gloves are the best gloved protection you can get – NB often a requirement to Track days.
Be sure the material in your gloves is an appropriate leather, reinforced stitching. Armored gloves can have CE rated plastics and armors around fingers and knuckles, with Kevlar panels, & always try get a pair additional palm protection sliders.
Trousers & Jackets
The best projection is usually the kit that required for the track, like a one piece leather race suit ( airbags became mandatory in MotoGP since the beginning of the 2018 World Championship season!) but for road riding there are more practical and affordable solutions.
Beyond the full race suit, you can have a slightly more practical split 2 piece leather kit, which usually connects at the waist, but there are lots of options and combinations of leather, textiles that blends of different materials, all designed specifically to protect you if you hit the tarmac ! (NB even Leather race suits (and 2 piece leathers) are also often blended with textiles for flexibility and air flow)
It’s important to remember you can build up your kit as you progress : mix and match! For example, you could add a premium piece of protection like an air bag vest (or an armored vest) to a relatively inexpensive textile textile kevlar reinforced jacket (which might have it’s own armor too) to ‘double up’ allowing you to seriously ‘upgrade’ your protection level.
If not going for leather, trousers/pants and jackets are usually made from a ‘Kevlar type’ of reinforced textile material to designed with abrasion resistance to protect from slides (be sure the details in the product description has information about the materials, look out for some mention of abrasion resistance grade!). Textile jackets and trousers/pants will often be blended with other composite/natural fibers and textiles to allow breath ability and additional flexibility.
Additionally, many trousers and jackets should have composite amour and padding in areas that need the most protection in a fall or crash. (Be sure if the product has ‘pockets’ for amour (rather than it being built in) – do not forget to actually buy the armor to fill those pockets!) It is best to make sure your jacket has some kind back / spine protection as a minimum.
With all of your kit – you need to consider the type of riding you will be doing (mostly) and your climate! (Air flow, breathability versus weather protection & warmth!)
Boots
There are two temptations when it comes to footwear. The first option is to to go for your running shoes, lots of grip on the pegs, light, breathable, and great feel, but you zero protection if foot suddenly gets caught on something in the road. The other temptation is your work construction boots (Dr Martin’s or something) – this is definitely better but not designed for the job.
Even wearing the best motorcycle armored full boot, if your foot gets caught in the chain when you have fall – you could still in some trouble, but you will be in better shape with a CE armored race boot, versus wearing trainers.
Again, review materials of the footwear you are considering versus one another : while obviously the best protection is a full race boot (as I noted above, the most protective kit is usually race/track orientated gear) but there are lots of alternatives with varying degrees of practicality, each designed with specific uses (and budgets) in mind – again as above, you need to consider the type of riding you will be doing (mostly) and your climate!
The sections below are just a simple overview of how the build progressed – including the major things that I learnt along the way.Visit and Like our Facebook page if you enjoy motorcycle related content!
Before I take you with me on this adventure – I’ll give you my ‘up front’ check list for any Cafe Racer build! Numbered below is a shortlist of a few things I have learnt from my first time on this journey. I will definitely try another build (maybe soon so watch this space) but the points below would have really helped me if I was starting out on this process again!
Buy a ‘runner’ with all parts of the original motorcycle actually ‘on’ the motorcycle if at all possible. Buying a motorcycle that comes in parts is asking for trouble – there’s no way to tell if all the parts are there and no way to tell if the engine is in any way good. Even if you plan replace all the parts – I found that I learnt a massive amount from taking the old pieces off!
Do not under estimate the time commitment required. I worked at this project every other night for around a month and a half, I was organised. (This was not just a ‘cosmetic’ build – see details about the gearbox and cylinder heads below!)
Be sure that your base bike is ‘common enough’ that there are plenty of ‘retro fit’ parts or breakage parts available (search eBay before you buy the base motorcycle to check that there is a good number of listings that at least mention your prospective machine)
Check the gear box, and examine the smoke from a cold start. Unless you are a up for a really big challenge make sure the gear box is running cleanly up and down all the gears. If the exhaust smoke is blue – you’ve maybe got oil ingress issues coming into the combustion cycle – which means at the very least you ‘could’ be looking at a top end tear down and rebuild. White smoke more often indicates water ingress, a fueling issue, air / carb issue, whilst black smoke can indicate similar issues as above or compression problems: the combustion cycle and associated pressures may not be burning the fuel efficiently.
Create and stick to a budget! After you’ve built a really neat budget, with lots detail , take the total and add 20% : I promise you the project will overrun. The biggest mistake I made when it came to budget considerations – was not considering I might have to buy lots of additional tools which I did not already have in my arsenal – a Torque Wrench, a Feeler Gauge..do you think you’ll need a Carb Balancing Kit?
Buy the Haynes manual– please don’t even hesitate on this one – especially if you’re delving into the engine. This was my bible for this build!
Keep your work-space tidy and organised. When you take pieces apart – either tag them – or set on a piece of paper or cardboard underneath them – write a note about that part on the paper to help in future reassembly.
Have a vision! Be sure you know roughly where you going – things will change along the way but it is important you have an end goal for your newly created machine. Use Pinterest to create a board with images of inspiring examples to get the juices flowing. Check out our Pinterest Boards when you are on there!
The story begins with bargain!
I set my bike budget at just £500, and gave myself £400 for the rest of the build. I did some research and decided a Honda CB250 model circa 1980’s would be a good option. I watched a few of these come and go on Gum-tree / Craigslist / Ebay… BUT.. I was patient. Then one Saturday morning I saw a 1980 Honda CB250 Superdream come up for just £250!
Yes, it was too good to be true – it looked stock (and ‘restored clean’) in the pictures but….
It was running very very smokey (I mean – I couldn’t see the Sun after starting it). The gentleman who was selling it had tried to solve this himself and bought a couple of separate engine heads – but he just didn’t have the time to investigate or put the time into swapping out an alternate head for the existing one.
Sadly it wasn’t the back tyre causing the smoke on my Honda 🙂
The second, and main issue, was that the 2nd gear was ‘lumpy.’ While it shifted into 2nd OK – it made an awfully unpleasant notching & grinding noise. The other gears appeared fine, and the clutch engaged OK, but something was very wrong with the gearbox.
As well as the spare engine head unit – the seller had also sourced a reclaimed gear box from eBay – but again he simply didn’t have the time to do a full engine dismantlement and reassembly. The bike had been sitting in his shed for years – an abandoned project.
If I bought this – I knew I was in for a full engine dismantlement and reassembly – and all of this on top of the other ‘Cafe Racer’ modifications and additions I wanted to do!
In hindsight – as per my ‘list’ above – I would definitely look out for a more mechanically sound engine, as per my list above!
So, with almost zero mechanical experience (but a willingness to learn) , I paid £250 for a running (very very smokey) Honda CB250 SuperDream, with most of an entire spare (used) engine thrown in!
Just a note : the story and images here are a not a full guide on how to build a cafe racer – it is just a short insight into SOME of the trials , tribulations (and fun!) of my journey, but I hope you have fun reading it!
Now, while I highly recommend the Haynes Workshop manual – it still takes a lot of mechanical common sense to tackle something like this. When it comes down to it – you basically have to start unscrewing things and stripping the thing apart.
I bagged and tagged sets of screws and bolts as I went: in fact I put everything I removed that was small enough into bags, my advice is to write a note on the bags to tell you where the parts inside belong! (Even make a note of the Haynes page and paragraph you are on!) This little bit of extra time and care taken ‘up front’ really saved me a lot of pain when it came to reassembly.
So here we go!
The first job was to get the engine cleanly removed from the frame! This took me about two nights & an afternoon. The process of engine dismantling and rebuilding (which follows below) was a fantastic learning experience that I recommend to anyone interesting in motorcycle technology. My Honda CB250 Engine – ‘on the bench’. (The little box of sockets in the picture are one of my favorite pieces of kit – you can pick them up from amazon here) Here we see the rocker mechanism after removing the cover : the springs you can see sit on top of the valves, keeping them closed. [When putting the engine back together this is the stage where you set the ‘valve clearance’ gaps using a feeler gauge.]
The rocker arms ‘rock’ back and forth pressing the valves open / closed in a sequence which is regulated by the timing chain at the center of the picture. The clearances between the end of the arm and where the arm presses on the values to open them, are adjusted by the lock nuts you can see at the end of each arm. Many older motorcycles and some new dirt bikes and trials machines still require frequent valve clearance checks.
There was so much to learn at this point, and I was only at the very beginning of the dismantling process! Please understand that I’m writing this article as if you’ve not seen inside a basic motorcycle engine before – I am deliberately just giving you ‘a flavor’ by covering some of the technical terms you’ve maybe heard mechanics talk about before! This is the ‘nut of the devil’ otherwise known as the clutch hub lock nut. It was one of the most challenging parts of the whole disassembly! I fashioned my own clutch nut removal tool ; which I would NOT recommend – just buy one.
While the Haynes manual did a good job explaining how to make a home made a lock nut removal tool – the job of actually releasing the lock nut was awful. I still have nightmares. A ‘few’ nights later – the picture above shows the internals of the lower half of the engine exposed. You can see the second gear cog has a tooth missing! [The cog closest to the right of the picture]. Problem identified! The spare engine components thankfully included a spare set of gear cogs – but these things can picked on up from eBay fairly easily. You can also see in this image the gear change barrel – when it rotates, it causes the gear selector forks (which sit in the deep groves of the barrel) to get moved back and forth, translating the sequential up & down movement of the input foot lever to the transverse movement of the forks along the axis of the gearing. Fascinating! (Well I thought so!)I began the painting a little early (with heat resistant engine paint of course!) then realized I had neglected to swap out the head unit! (So another few nights later, after having to buy more gaskets, the new head was attached and the engine above was almost ready (again). I spent a considerable time reading and learning how to strip back and then how to paint a tank. Here are some my biggest learnings to help you if you tackle a project like this! 1. You can use spray cans (that’s what I did) – but yes, using a compressor and sprayer will be a better job. 2. Sanding down to using (eventually) a super fine wet and dry grit to achieve as good a surface as possible, is the absolute key to the final finish looking good. The final paint finish will only ever be as good as the preparation to the surface you have put in. Don’t skip the primer (and don’t skip recommended number of coats). 3. IMPORTANT – Be sure to buy a proper petrol proof lacquer. The first lacquer I used was labelled ‘automotive’ – when I splashed a tiny drop of petrol on the tank (the first time I was testing the bike fueling) – a bubbling paint blister greeted me. Yes – I had to paint the tank again.
Next time I would definitely consider either buying a ready painted tank or paying for a professional to do this – but it IS possible for an absolute amateur (like you or me) to get the job done!
I tried to create my own seat from the existing one – to cut the story short – I simply was not happy with it. A £20 eBay cheap option came to my rescue, or so I thought! The universal eBay cafe racer seat I found – wasn’t really universal but I expected that! I had to work through a considerable amount of inventive fabrication to get the new seat (the one you can see in the final pictures) to fit. The challenge was getting it to mount with lock nuts flush to the tank and frame. Overall this was one of the most time consuming and challenging pieces of the build. (I spent longer adjusting and getting the eBay seat to fit than I did in fabricating my own seat that you can see in the images above!)Cleaning the covers brought me the into the entire new “world” of metal polishing techniques. I’ll write a blog post on this some day. Again – preparation of the surface is key. I did buy a cheap set of metal polish attachments for my drill (and the multi-tool was also invaluable). Again – I could have spent another month getting the metal work to shine like like sun – but I wanted to it be good, rather than perfection. The image of the covers above is before treatment. The image below shows carb covers, before, and then after a little work with a polish kit. I then finished off to a reasonable finish with Autosol metal polish, amazing stuff.
I have only a few photos of the carburetors ‘mid-build’. One of the keys was buying a good Carb cleaner (basically – petrol based solvent!) to ensure that all parts were thoroughly cleaned. If you have a pressured air gun- use it here. Check that your diaphragms are in good order – if needed just replace them when the part is in pieces!
Carburetor valve setting and needle adjustment is another entire area of study and learning – I’ll not go into it here! If your other half has an ultra sonic jewelry cleaner – this is a fantastic use for it! Strip down everything on the carb and pop the pieces in there! You can pick up these ultrasonic baths easily from Amazon!
I also bought a carburetor balancing kit – difficult to use (you’ll find some instructional videos on YouTube) : this is the one I bought here! [A balancing kit is effectively a vacuum strength measurement device – it gives you a reading which allows you to set each carburetor’s intake to develop the same level of base vacuum draw in each cylinder. ] I’ll maybe write a separate blog on to give some information around carburetors at some point!
You can see here I tried to paint the springs using a rubberised paint. I didn’t like the finish – it was a very dull matt. Instead I was able to pick up brand new replacement rear spring sets for £30 or so. I’ll mention here that I also had to learn how to replace front fork seals! Surprisingly not one of the most difficult jobs of the build – just follow any online YouTube tutorial and be brave! (Or, like and follow our Facebook page to contact me if you want to know more!)
I also sourced a ‘seat hoop’ from eBay (the metal hoop you can see in the image above at the back of the bike). I got the old frame chopped off and the new hoop attached after some basic trial and error! (I used an arc welder for this – which was much too strong for this delicate thin metal – but with some perseverance and a few prayers, it held)
When it comes the electronics – take photos of everything for reference, BEFORE you take the parts off the bike. I also marked each wire (if I couldn’t get a permanent marker onto the clips – I used a piece of masking tape.)
I labelled each side of each connection where there was clip joint, starting 1 – 1 ,then 2 – 2 , 3 – 3 , etc , etc. Using the same number on each side of broken apart clip. A voltmeter is also invaluable for tracing wiring connections and for testing when you’re swapping in new electronic components later in the build. Challenges for me included mounting the electronics board – I had to build a new ‘cradle’ beneath the seat (as opposed it being mounted on the side of the stock machine. I also realised late in the build that I needed an updated indicator relay to cope with the new lower voltage indicators I had bought! (Without the impedance provided by the new the relay – the newer indicator lights flashed much too quickly!)
I decided to use the existing speedometer and tachometer. I mounted the old units inside a shiny chrome cover (from China Ali-Express!). Of course nothing fitted as it should have and I had some serious work to get the units to fit in place neatly! Next time – I’d consider buying new dials instead of reusing the existing units.
The paint I used on the rims was a rubberized hard wearing compound – designed to resist stone chips etc. Spray can paint proving its worth again (just be sure to apply even, multiple coats , do not rush, avoid the dreaded runs!)
The Finished Machine – time for a race to a cafe for a coffee.
There was a considerable number of other challenges to get this bike through a UK MOT service and fit for the road (many of which I haven’t even mentioned in the above summary article!). It still had a few niggling issues when I sold it unfortunately – but I was upfront with the buyer that it was still facing some issues.
Admit it – there’s something very satisfying about cleaning machinery…working hard to reveal the mechanical art obscured by grime and filth. Sometimes, I love cleaning my motorcycles – because you get see that mud covered monster emerge as a it once was, rising like a metallic phoenix from underneath the obfuscation of oils , to be reborn, shiny, clean and free. Ok – I’m going overboard – but it will definitely give your day a boost : clean your bike, and feel that pride of ownership coming back. 😎
Just be clear before we continue, cleaning and lubricating your chain is more important than any of the general washing below. I would recommend, you inspect, clean and lubricate your chain at the very least once a week. A natural time to do so is when you are cleaning the rest of the bike. Be aware that when washing the rest of your bike the water & soap you use can strip off your chain lubricant anyway, so this definitely a good time to reapply. Look out for a separate article coming soon with some guidance around how best to inspect, clean and lubricate your chain correctly.
Preparation
Get your bike onto a piece of ground that you do not mind getting some muck / oils onto (or put down some ground protection). Get the wheels on paddock stands / center stand. (Obviously not required – but extremely helpful to get around those wheels and the chain).
Make sure the bike is cooled down – soap on a hot bike (or on hot chrome) can do strange things.
Get your cleaning products laid out and within easy reach – simply so that you are not running back and forward to the shed, it sounds simple , but it really does the whole job much less of a chore.
If your bike is really really muddy – give it a quick once over with the sponge/soft brush and just some warm water. When done – refresh your water bucket, and measure out the required amount of soap as directed on the bottle.
Start working down from the top of your bike, downward. Do this in a logical fashion, finishing each item ‘as a whole’ before moving to the next. I usually do things in the same order every time so that I do not miss anything. I usually start with the tank, seat, under seat, handlebars, any plastic fairings, engine / engine covers, lights, then other exposed areas, finishing on wheel rims.
Be gentle around the radiator – you can use thesoft brush, to dislodge those bugs, but you want to take care not to be bending fins or puncturing the mesh. Try to not get soap and cleaning products on your brakes discs or calipers, a quick wipe with just warm water is often all that is needed, be sure to rinse off any soap that does get onto them.
As I mentioned above, I’ll write a more detailed article on chain care separately- but please do make sure you clean it thoroughly , using a proper chain cleaner product (and these cheap chain brushes are awesome), spend some time here: chain care is an important piece of maintenance, this is much more than just cosmetics.
This cleaning method that I am describing here is deliberately quick, because one of the main reasons we (myself included) let our bikes go unwashed for so long is that we take so long over the process of washing them. We do not want to give up two hours of our Saturday morning to wash a motorcycle when we could be riding it! I treat washing my motorcycle like a race – start a timer & see how fast you get this done! From start to finish I can get a really thorough wash done in 30 minutes. (On the other hand there are definitely some riders who enjoy the whole process and find it therapeutic to take it slowly – which is great !)
After you’ve soaped down, agitated, and dislodged all the dirt and grime – get the garden hose and gently rinse the whole machine. Get a dry chamois (clean with no grit!) – and give the whole bike a quick rub down to dry off the most of the remaining water – start with the tank in case you pick up grit on other parts.
I’ve had great success using a bike dyer (or if you have a leaf blower, or compressed air) to be sure that you are getting all the little difficult to reach places dried out thoroughly.
If you want to, you could wax the paintwork, it’ll add extra shine and protect the finish – consider polishing the chrome too, but use the specialist chrome and metal polishes for the job. Titanium pipework can also be a little temperamental (when titanium it heats up – some patterning can occur where residual surface oils and products can leave marks) so be sure to wash off all that excess soap and do not use your ordinary bodywork polish on those areas.
Consider applying a protective coast of ACF-50 – an anti corrosive I use on everything – originally developed for the aerospace industry – this is amazing stuff.
Let the engine run for 5 minutes and if you can to go for a quick ride to help blow out any remaining moisture that hasn’t already been removed.
Can I use a power/pressure washer or jet washer?
The short answer is yes – if you use common sense. Turn the power pressure down to the lowest setting, do not concentrate the jet on anything that resembles a seal, a bearing (like a wheel bearing) or is an electrical item. Again, for me, it is more bothersome and hassle to get the pressure washer rigged up – which might put me off getting starting the job at all!
Enjoy your clean machine, make sure you get out there and get it good and dirty again as soon as possible.
Like a loaf of bread, the baker wants to provide you with food that tastes good for about 3 -5 days or so..it’s the same with tires, they last longer than 5 days, but they do have a shelf life! (Please do not try eating your motorcycle tires).
It doesn’t happen quickly, but tires degrade and decompose over time! Simply, as a tire gets older, the rubber loses its softness through natural chemical changes.
Before we continue…there is some common sense needed when it comes to tire age. Let us say your motorcycle mechanic has put new tires on your motorbike and you check those tire numbers out (see how to read tire age below). To your horror, you discover they are already just over a year old! (I’ve heard of people getting super upset about this.. ) There is no need to refuse a 1 year old tire, it is still new. In reality it is almost certain you will be replacing those tires long before they get too ‘old’.
The average manufacturer, usually recommend that a tire performs optimally before it is 5-6 years old. But how long does it take to ‘wear out’ under average riding conditions?
Let us just say an ‘average’ motorcycle tire might last (with regards to tire tread) for between 2500 and 7500 miles of riding. (This will depend on a whole host of factors including, riding style, motorcycle type, the type of tyre you choose (soft sporty tires vs harder touring tires) and lots of other things)
Some of the riders I know ride about 2500 (casual hobby non commuter types) while other who commute ride well over +10,000 per year. Let us take those guys on the low end of the spectrum (riding just 2.5k miles per year) could well be needing replacements after just 2 years of riding! (Long before age will be a factor at all). [Just to be clear, as I said above, there are many dozens of other factors that determine the speed of tire wear, aside from just the mileage you cover, but I’m just trying to present a simplified example.]
What is important is that you inspect your tires for tread depth, uneven wear, squaring off, colour degrading, ballooning, scalloping, cracking & of course pressure. A thirty seconds visual inspection before you set off could be a life saver. (NB if your inspection reveals the tell tale signs of a puncture repair – get the tire replaced. Do not ride on a temporary puncture plug; while these puncture repairplug kits are excellent, they are designed to get you home safely, not for another 5000 miles averaging 100mph.)
Most tires have tread depth markers in the rubber, but it’s still a good idea to use a tire tread checkerat least once a month and be sure.
Aside from wear, there are lots of factors that can make a tire rubber degrade more quickly too. Higher standing temperatures in your country can accelerate degradation, or, whether you store your bike in direct sunlight or not – direct sunlight can chemically alter your tire making it age faster. Review your tire for subtle changes in colour especially if you store your tire outside (use the quick thumb nail test below regularly). Consider usinga bike cover when storing it outside even though it’s dry, it can keep the sun off as well as the rain!
A quick check on the quality of your rubber is the thumbnail check – if you can’t get your thumbnail pressed into the tire at all – get it down to your mechanic and get new rubber. (You need to press your nail into the rubber relatively hard – it’s not a sponge). You are just looking for the rubber to allow you to press your nail into it a little, and for the rubber to ‘bounce back’ from your little nail indent very shortly after your thumb nail is removed.
So how do you tell what the date of manufacture is?
Look on the outer sidewall for the acronym “DOT,” which should be followed by a series of numbers. The last four digits are what you need to determine when the tire was manufactured. The first two numbers represent the week, and the second pair indicates the year. For example, a tire with the digits 2510 was made in the 25th week of 2010.
As a rule of thumb on age – we suggest tyres should be replaced after 6 years , regardless of how many miles they have done. After 10 years they could be so hard, they may be hazardous.
At Smart Motorcycling Guide we encourage all weather, all year round riding. You can ride your motorcycle through the winter, protect it with anti corrosives, wash it well, clean and dry it thoroughly and continue to make sure your chain is well protected. BUT we appreciate that wet and cold weather riding is not for everyone.
Even if you do plan to ride your bike through the colder weather, the article below still provides some good advice for the other times when short term storage is still needed.
Nah,too much work .. I just want to park it.
The good news is that proper storage shouldn’t take more than a few hours of work..not a massive investment of time to be sure that your motorcycle will remain in tip-top condition in terms of looks, mechanical condition and trouble free future riding.
Fuel for a “stable” relationship
On carbureted bikes, drain the carbs , fill the tank filled with stabilized fuel. Start by turning off the fuel line at the tank tap (petcock) , unscrew the drains at the bottom of the carb float bowls and drain them out (this is a good chance to check that your carbs are clean, the drained fuel should have no specks or rust, dirt or grime. If it does, time for a carb clean). With the fuel line still turned off at the tank side, run the bike until it dies (to suck the rest out of the carbs). Mix in your stabiliser in the tank You are aiming for a full tank as far as possible, but no need for it to be so full that it is squirting out when you close the filler cap. (If you can’t drain your carbs for some reason, just run the stabilized fuel through the system by letting the bike warm up for 5 mins).
Fuel-injected? Same as above, but no carbs to worry about. Fill that tank, add stabilizer, run it through the machine for 5 mins or so. Done.
Each stabilizer manufacturer will tell you how much to use, how long the fuel is usable when treated, read the instructions. Just buy some and use it guys.
Get your motor running, but no need to get out on the highway.
Unless you’ve got a temperature and moisture controlled Garage .. you will always have some condensation to worry about..this can cause rot from the inside out, so it is always a good idea to start the bike and give it a good warm up every few weeks. You don’t have to take it out of your garage, but open the garage door so that fumes can escape, and let it warm up for a good 10 minutes. Remember to allow the bike to cool before re-applying corrosion protection and covering it up again.
Keep it clean gentlemen
Next be sure and clean you motorcycle thoroughly. Use a good automotive washing agent to get rid of all that grime that collected over the past several months. Grime can hide and harbor damp..damp leads to rust. After washing make sure that your bike is completely dry. If you have compressed air available, use it. If you’ve no compressed air – this motorcycle dryer is a really fantastic alternative, which I use myself!
Lube me up
Re-lubricate the motorcycle; check any pivoting joints and your chain. I use chain lube for almost everything needing some lubrication on the motorcycle. It’s not corrosive to rubbers and plastics and usually good enough for most moving parts and surfaces. Finally, we highly recommend the use of an anti corrosion treatment – ACF50 is amazing stuff, messy, but amazing. (This is some seriously slippy juice – DO NOT get it near your brakes or tires, cover them up before using this stuff)
Wax on Wax off
Use a good wax to coat and polish the surfaces. Again, avoid the brakes.
Get the tires up and off of the ground. If you have a center stand, great. If not, invest in a pair of stands to get the bike up (you’re reliving the suspension). They will pay for themselves numerous times over.
Take a Power nap
Save yourself the grief of needing a new battery come spring by using a battery tender. Like getting the tires up, this investment will pay for itself over and over again.
These are just a few ideas to keep your bike in great shape when not being ridden for an extended period. A small amount of time and investment will result in a huge time and money savings later.
This article was written to ENCOURAGE motorcyclists to get out there in the rain!
Like any experienced lover motorcycle rider, you should know that being too aggressive is often a quick way to getting a black eye or a broken arm, instead the best results are usually achieved from being smooth and gentle. The best lovers riders, will take their time. Always ensure that things are are warmed up properly (your tyres), especially in ‘wet’ and slippery conditions.
Yes, there is definitely a time and place to be a fast passionate lover rider, where you can be really vigorous (with the throttle) and aggressive (on the brakes). This is often when you take a special trip away from home. (What I’m obviously saying is that Track Day performances, belong on the track – where you have the proper protection, no traffic coming the other direction, gravel traps for when you don’t judge that corner just right and you’ll have a full race suit on.)
‘Feathering’ the Throttle.
Be gentle on the throttle: rain reduces the friction coefficient you have to work with between your tyres and the road. Your aim is to apply your acceleration force GENTLY, keep the force you apply as you accelerate, progressively even, consistent and smooth (a higher ‘shock’ force is generated if you ‘snap’ the throttle quickly open – the tyre can break loose by exceeding the available grip and your wheel will spin). If you spin the rear tyre, just try not to panic, remember you are a smooth and gentle rider. If you are lucky enough to be still upright, try to ‘ride it out’ , let your machine come back to a straight line, then GENTLY come back off the gas, no sharp corrective turning, no sharp braking.
The only real way to prepare for the feeling of the rear ‘letting go’ or ‘stepping out/spinning up’ is to get some experience of it actually happening! Book yourself into an advanced rider course, or take a blast on a dirt bike and purposefully get that tail slipping around. Consider enrolling in a stunt program and get some rolling burnout hooliganism under your belt, in the name of safety! Remember you want to be as familiar with this drifting ‘feeling’ so that when it happens unexpectedly, you will be better placed with some muscle memory to know naturally what to do.
If you have traction control settings or rider modes, please use them! You are not going to impress anyone in the hospital emergency room by letting them know that you have balls SO large, that you NEVER use rain mode.
A Gentleman never ‘grabs’ (the brakes)!
Even those of you with ABS please do apply the following techniques. You have ABS as a final protective measure, it is designed to help prevent lock-up in those situations where at the last minute you have had to hit the brakes hard, unexpectedly. (Yes track riders will be pushing up against the limits of ABS, but we’re talking reasonable (wet) road riding here.) The way you should be braking in rain..you guessed it.. ‘gentle and smooth’. Plan your braking even further ahead verus when riding on dry roads, consider the extra time you need to gently bring your machine to a stop. Imagine you have a glass of water balanced on your handle bars…you should be braking so smoothly and gently that you’re not going to spill a drop.
Respect Road markings.
A massive white arrow painted on the road – or a line in the middle of the road will both present you an area that is more slippery than that the rest of the asphalt. Your best option is to plan your line to avoid these markings (defensive riding) otherwise, imagine those markings are like an oil slick, or ice. This means basically no braking while on top of them, only mildest steering input, and the application of a flat/even throttle (or even rolling off the throttle).
Corner gently BUT deliberately.
Your bike’s geometry behaves essentially in the same way in the wet as it does it in the dry. Drive through corners in the same even and deliberate way as you would in the dry; but aim to maximise your gentleness & smoothness as turn and transition. Plan your corner knowing it is best to have a decreased overall cornering speed versus what you would plan in dry conditions. As you are coming into the corner with gentle/smooth braking applied, plan a smooth gentle line through. As you reach the point where you are beginning to ‘roll on’ again, do so, but gently, this is loading your rear tyre evenly and still working weight onto the rear suspension which helps keep your bike settled and stable as you drive deliberately but gently out of the turn. No ‘coasting’ guys, you are asking for trouble.
What about Tire’s
The key is having a tire with a tread pattern made to slice through and disperse water, this helps avoid aquaplaning and will keep your rubber planted on the road! There are a number of fantastic all round touring tires than are not just good wet , but are fantastic for everyday use , touring, and a back road blast on the twists. We recommend The Michelin Pilot Road series, a fantastic wet tire and a great all rounder.
Tire pressure is a contentious issue, some riders will recommend a slight increase in PSI, others a slight decrease..we recommend that you keep your pressures in line with the manufacturer’s guidelines for the bike and the weight you riding with. On the streets, it’s not worth changing the tire pressures outside the manufacturer’s guidelines just to suit riding conditions.
Helmet considerations for the riding in the rain?
Firstly, if you can, get a pin-lock system onto your visor to prevent fogging, really does a fantastic job. We also found this fantastic device that attached to a finger on your glove – a mini wind-shield wiper blade!
Motorcycle Clothing for wet weather riding?
Firstly, protecting your body from rain and cold will make you feel much more comfortable on the bike, and as I’ve mentioned in my post about Cold Hands – being distraction is super important.
If it’s raining, you are even less visible – rain decreases visibility (not just for you but for all other road users) Swallow your pride guys, seek out rain gear that has reflective elements. Some of the best examples of wet we have found include: please follow the links to have a more detailed look, get yourself properly kitted out now.